How To Tamp Espresso: Essential Tips on Tamping Pressure
Why learn how to tamp espresso?

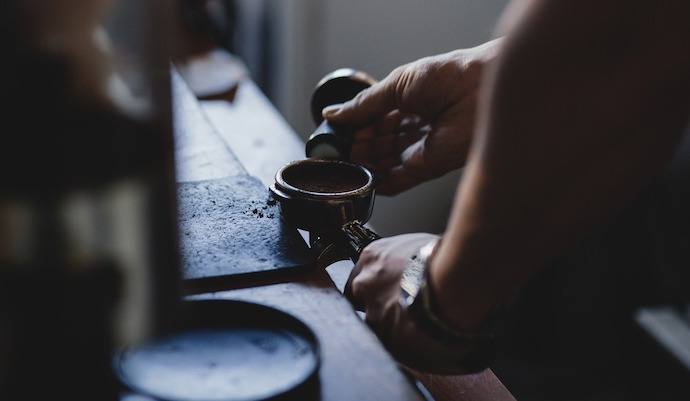
Imagine the following scenario. You’ve done everything right. You bought a great machine, hunted down the perfect espresso beans, and used a burr grinder to grind it to a fine setting. Your favorite podcast is on-deck. The house is quiet. Life is good. You’re ready for that perfect shot.
Then you take that first sip of rich, dark liquid… And it tastes sour or bitter! What happened?
You probably need to master the tamp: the art and science of properly pressing down the coffee grounds for an effective extraction. It’s not as easy as it sounds, but this guide will have you tamping like a pro barista.
What Is Tamping?
The purpose of tamping is to make a compact coffee bed. The packed coffee creates resistance, making the water work to push through it. This pressure extracts flavor. Learning proper espresso tamping – how the ground coffee is packed into the portafilter basket – is key to getting this right (1).
Watch our video on espresso brewing basics for some useful tips, where we cover the fundamentals of tamping:
The water pressure pulls oils from the grounds and creates the bold taste and rich texture you expect. Water, like most humans, will take the path of least resistance. If the coffee grounds are loose and uneven, the water will find the gaps and move through there, not pulling enough of the flavor from the grounds.
… You must grind the coffee just fine enough, and tamp it down in the filter basket just firmly and uniformly enough, so that the barrier of ground coffee resists the pressure of the hot water sufficiently to produce a slow dribble of dark, rich liquid.
To avoid this water channeling, you push down on the grounds in the portafilter to create a compressed puck. It resists the water, and that tension creates the taste and consistency of the shot (2). It can be a bit of trial and error to get this right, but it’s worth it.
If it seems complicated, don’t let it intimidate you. Soon, it will be second nature.
What You Need
- A good espresso machine
- Espresso beans
- A grinder that can grind for espresso
- A scale
- A portafilter
- An espresso tamper
- A coffee tamper mat (optional)
A note:
- The only thing you don’t necessarily need for this practice is a coffee tamper mat. But, I won’t lie to you, the mat improves the experience substantially.
Which is the best espresso tamper?
There are a few key things to consider when buying an espresso tamper. Most importantly, it needs to fit your portafilter. Most commercial espresso machines have 58 mm portafilters, but domestic machines vary. Check your user manual to be certain.
Your tamper should also be heavy. If your espresso machine came with a lightweight plastic tamper, toss it in the trash ASAP. It doesn’t have the heft to tamp the espresso properly.
A calibrated tamper costs a bit more, but it’s a worthwhile splurge if you want to be certain exactly how much force you’re applying – and that you’re applying the same force every time.
Check out our list of the best tampers for some great suggestions!
Can you tamp without a tamper?
Yes, but I don’t recommend it unless you’re really in a pinch. You can use any item that fits your portafilter and can take some pressure. (e.g. spice or salt jar). Think of this as an “emergency hack,” kind of like making an espresso without a machine. It will work, but it will be tough to get the perfect shot of espresso.
Step-by-Step: How To Tamp Espresso Like A Pro
Okay, let’s get down to it. You’ve got your tamping items ready, it’s time to tamp. Your delicious espresso shot awaits!
1. Even Out Your Grounds
Put your coffee grounds into the portafilter; then take your index finger and run it across the top of the portafilter, pushing off any extra grounds. It has to be even and level. Don’t put pressure on it until it is, or you will get an uneven extraction, and that means a less than perfect taste (3).

2. Place Your Portfilter on a Level Surface
Place your portafilter on a flat surface so it’s level. Some portafilters are level on a benchtop; others will require you to find an edge or buy a tamping stand.
A tamping mat helps prevent slipping makes the process less messy.
Hold the tamper in your dominant hand. Keep your wrist straight and your elbow bent at about a 90-degree angle. This helps the power to come from your body rather than your wrist. This technique saves you from repetitive strain injuries and lets you better control the pressure.
You don’t want to enter on an angle and correct it later because you’ve already changed the distribution of the coffee by that point.
3. Apply A Light Amount Of Pressure
Apply pressure lightly so that a puck shape forms with the ground coffee. We’re talking about 15 pounds of pressure or so to start.
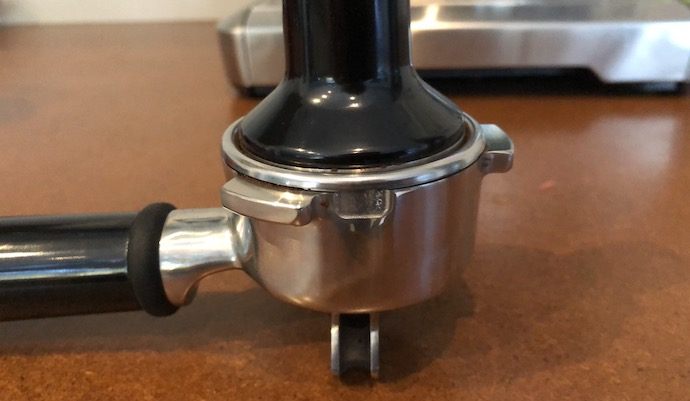
The aim is to get a flat surface.
An uneven tamp surface will promote pooling and poorly extracted espresso.
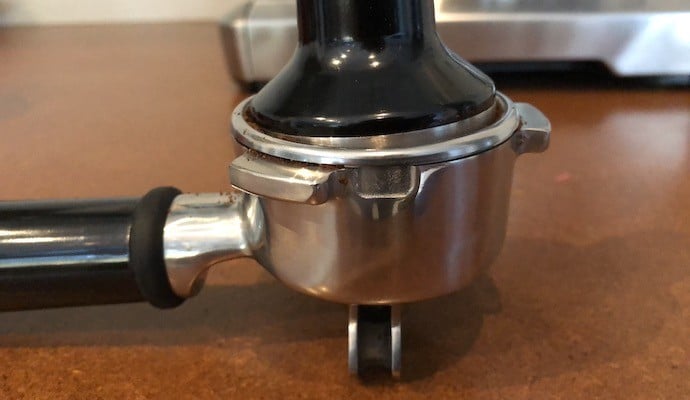
4. Apply More Pressure
Now that you have a level bed of coffee grounds, its time to tamp your espresso. Put more force into it, and push down harder to get rid of any spaces between the grinds. You want to tamp down hard enough to make the coffee compact and sturdy (4).

This is compact and sturdy coffee.
How hard should you tamp espresso?
There is plenty of spirited discussion about the right amount of pressure to use when tamping. I recently went out and asked six baristas in four coffee shops about this. They all had slight variations in what they do, but they all agreed that firm and consistent pressure is crucial. Even-handed pressure is as important as the strength of force.
The recommended range: between 20 to 30 pounds of pressure.
How Do I Know How Much Tamping Pressure I’m Applying?
I find that 30 lbs of pressure works well. How much is that? What does 30 lbs of pressure feel like?
If you have a tamper calibrated to 30 lbs, it will tell you. Otherwise, get out your bathroom scale and push down on it until you hit the 30 lb mark. This helps you get a sense for the amount of pressure required (5).
5. Give it a twist
Use a downward twisting motion as you are coming up out of pushing down, which continues to compact the coffee. As you are applying the final pressure, rotate the tamper to leave a smooth finish to the compacted coffee puck. This is the polish (6). I call it my “tamp stamp”.
The polish isn’t necessary and is a bit of a show-off move, but it can be worth it – especially if you have someone watching you make the shot.
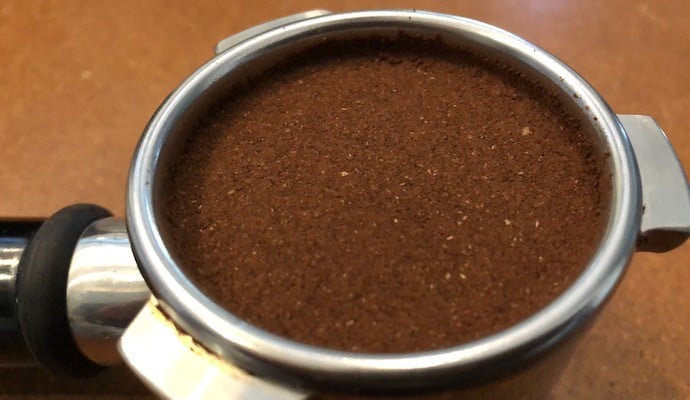
6. Check for a flat, level surface
Double check your puck to make sure that there are no gaps, spaces, or loose spots. You want to make sure that there is a solid, compact puck of coffee. This visual confirmation is an important step for me in creating a good tamp.
7. Clean up loose coffee grounds
Before you finish up, take a cloth and wipe off any excess coffee grounds that spilled around the edges of the portafilter. You don’t want any rogue grounds running around. The portafilter should go into the machine nice and clean.
That’s how you tamp espresso correctly. Now comes the fun part: how to make an espresso!
Final Thoughts and Tips
The art and science of tamping might seem complicated and overly technical at first. But once you master the tamping technique, it’s a quick and easy process. Enjoying great espresso at home is worth the time it takes to learn how to do it properly.
FAQs
If you don’t tamp coffee, or if you don’t tamp hard enough, the pressurized hot water from your espresso machine won’t encounter enough resistance at the coffee puck. It will flow through much too quickly to extract any flavor. Your shot will taste weak, watery, and disappointing.
You can tap or gently shake the portafilter before tamping in order to get the grounds to settle before you wipe off the excess with your finger. However, you should never tap the portafilter after the tamp. That can disrupt the perfect puck you just created.
Yes, you need to tamp with a pressurized portafilter, but the quality of your puck preparation is less important. Even if your tamp isn’t perfect (not hard enough, not quite level) or your grind is a bit too coarse, you’ll still get a nice-looking espresso. But it will taste better if it’s tamped properly.
Yes, you can tamp espresso too hard, but it is surprisingly difficult to do. Tamping espresso too hard is bad for your wrist and can cause over-extraction. Packing down the coffee too tightly means that the water has a hard time flowing through. This increases the coffee extraction time, letting more bitter and harsh flavors into your cup (7).
Grind size affects the extraction rate by determining how closely the coffee grinds can be compacted when you tamp. Finer grinds will make a dense coffee puck. Grind size can be the difference between delicious and bitter. This is where the term “dialing in the shot” comes into play (8).
References
- Petrich, I. (2019, February 14). Weighing, Grinding, Tamping: How to Pull a Great Espresso Shot. Retrieved from https://www.perfectdailygrind.com/2017/12/weighing-grinding-tamping-pull-great-espresso-shot
- Holschuh, A. (2018, October 08). Pressure and Flow. Retrieved from https://dailycoffeenews.com/2018/10/05/pressure-and-flow/
- Davids, K. (2017, November 02). Brewing Espresso at Home by Kenneth Davids. Retrieved from https://www.coffeereview.com/brewing-espresso-at-home/
- Fink, M. (2017, February 14). Level Up – Even Espresso Distribution. Retrieved from https://fivesenses.com.au/blogs/news/level-even-espresso-distribution/
- S. (2017, September 07). Ultimate Brew Guide For Espresso. Retrieved from https://driftaway.coffee/ultimate-brew-guide-for-espresso/
- Espresso Brewing: Perfecting the Crema. (n.d.). Retrieved from https://www.coffeereview.com/coffee-reference/espresso/espresso-brewing/perfecting-the-crema/
- Coffee Extraction and How to Taste It. (2019, May 22). Retrieved from https://baristahustle.com/blog/coffee-extraction-and-how-to-taste-it/
- Mazzarello, B. (2018, May 08). Pro-Tips: How to Dial In the Grind. Retrieved from https://blog.bluebottlecoffee.com/posts/dialing-in-the-grind

i wonder where is number 7. so confused !!
Whoops, thanks!