AEROPRESS INSTRUCTIONS: OUR SUPER EASY RECIPE
So you bought an AeroPress? Congratulations. Now it’s time to make some amazing espresso-level coffee. You’re probably wondering which method you should use. And you’re right to wonder. The world of Aeropress has gone wild. As you’ll see, there are many ways to use this great little coffee maker.
Bottom line: if you’re unsure how to make a cup of Joe using the stock-standard Aeropress method (or want to check you’re doing it correctly), this a great place to start. In this brew guide, we will explain exactly how the standard Aeropress recipe goes.
There is more than one way to use the Aeropress
The process we’re exploring today is known as the standard Aeropress brewing method. But as the Aeropress has grown in popularity, so have advanced Aeropress recipes. Essentially, the other popular AeroPress brewing guide is a technique called the ‘inverted method’. But you can also use an Aeropress to make espresso and AeroPress cold brew coffee. Still, as a rule of thumb, the standard method is meant for straight-up black delicious coffee.
Alternatively, watch Steven from Home Brews Coffee use it as a no-bypass coffee brewer in the video below.
Before we delve into the nitty-gritty of this technique, here’s a brief summary to help you follow our step-by-step instructions:
First, take your AeroPress and pop a filter into the cap and screw it in place. Then, take the cylindrical tube and position it over your mug, brew the coffee, and plunge the finished product into your cup. That’s it – sounds easy, right? Even 2017 Brazil AeroPress Champion Leonardo Gonçalves thinks so (1).
Everyone can use the AeroPress; it’s a method for everyone. But the more you get to know it, the better the coffee it creates in the cup.
The Basic Aeropress Instructions
Below is our step by step Aeropress brew guide for making a perfect cup of coffee.
What You Need
- Hot water (just off boiling: 175-205°F)
- Coffee beans (ideally a single origin)
- A burr grinder (hand or electric)
- Timer
- A mug
- Aeropress scoop (or tablespoon)
- Aeropress paddle or spoon
- Paper or metal Aeropress filters
At a Glance
Brew Time
2 Minutes
Yield
1 Cup
Step 1: Measure and grind coffee
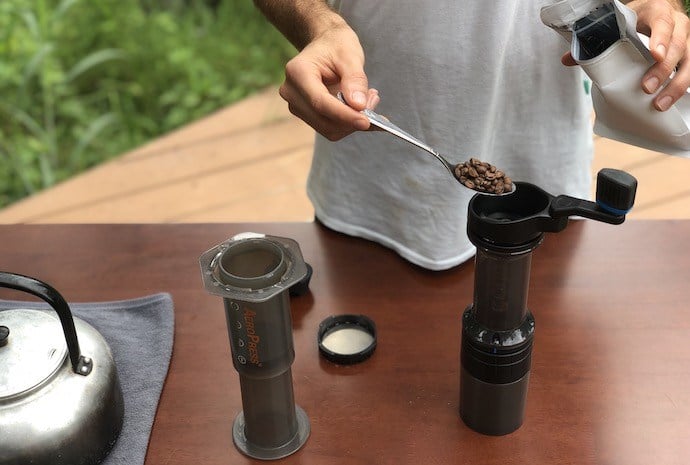
Measure out 16-17grams of coffee beans using your coffee scales. If you don’t have a scale handy, measure out 2.5 tablespoons, or one very-full Aeropress scoop (a full scoop is about 16 grams).
Grind your coffee beans until they’re medium-fine. (I highly suggest you pick a good bag coffee beans for Aeropress brewing.) By the time you’ve finished grinding they should be a similar consistency to table salt; the same size grounds you’d use when making coffee with a drip coffee maker (2).
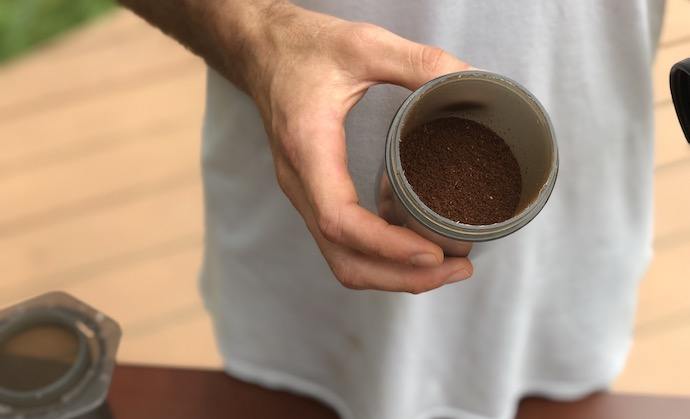
Aim for medium-fine grounds.
If you’re using a coffee sifter like the Kruve, throw away the smallest and largest particles and keep everything in between.
Step 2: Pre-heat, rinse and prepare your Aeropress
Place the filter inside of the Aeropress cap, and use boiling water to wash out the filter and wet your Aeropress.
If you’re using paper filters don’t be tempted to skip this step. Rinsing the filter removes any lingering paper odors, tastes, and dust, that impact the overall quality of the brew and helps the filter adhere to the cap (4).
This will also pre-heat your Aeropress and coffee mug, allowing your brewed coffee to retain its temperature for longer. Just don’t forget to throw out the water before brewing.
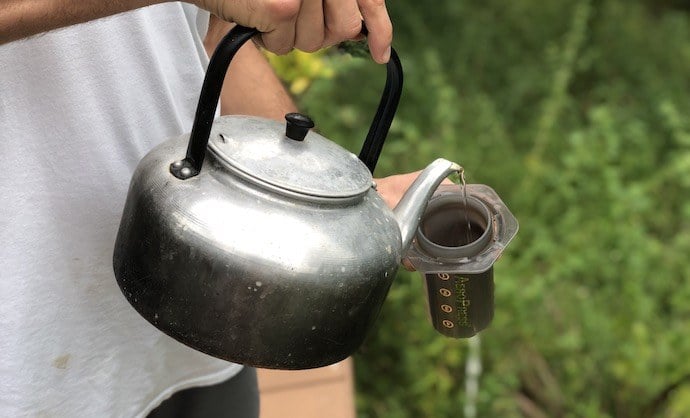
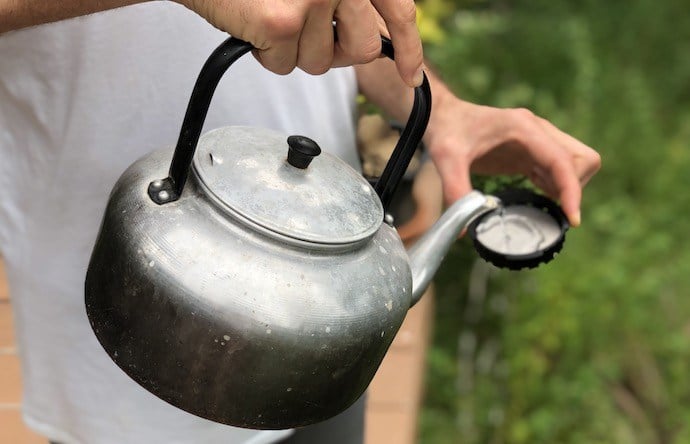
Step 3: Heat water
Boil your water aiming for a reading between 175°F and 205°F on your thermometer. You can start in the middle and adjust the temperature based on how your brew tastes.
Water quality and temperature is essential for brewing great coffee. Coffee is 98% water after all.
If you don’t have a thermometer, just heat the water until its boiling and allow it to cool for approximately 30 seconds. This should get it into the ballpark (depending on your climate of course).
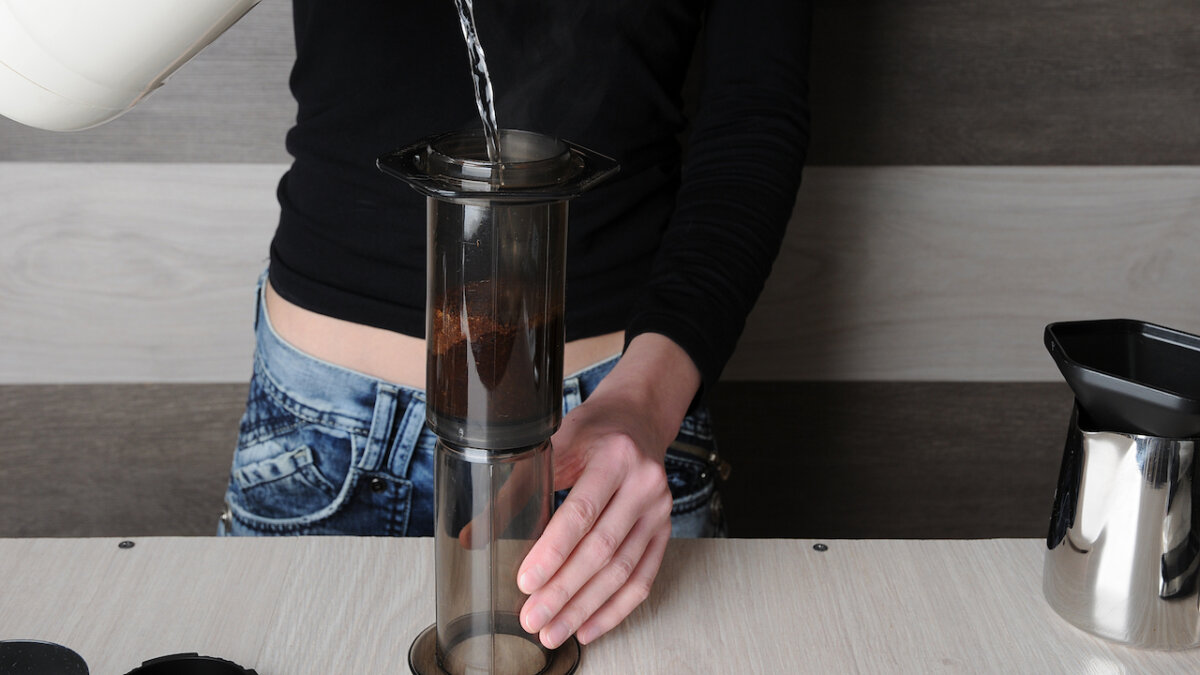
Step 4: Add ground coffee
Ensuring the brew chamber of the Aeropress is placed securely on top your mug, go ahead and add the coffee.

Give the chamber a shake to level our your grounds (which will avoid channeling). Now get your hot ready and get ready to pour.
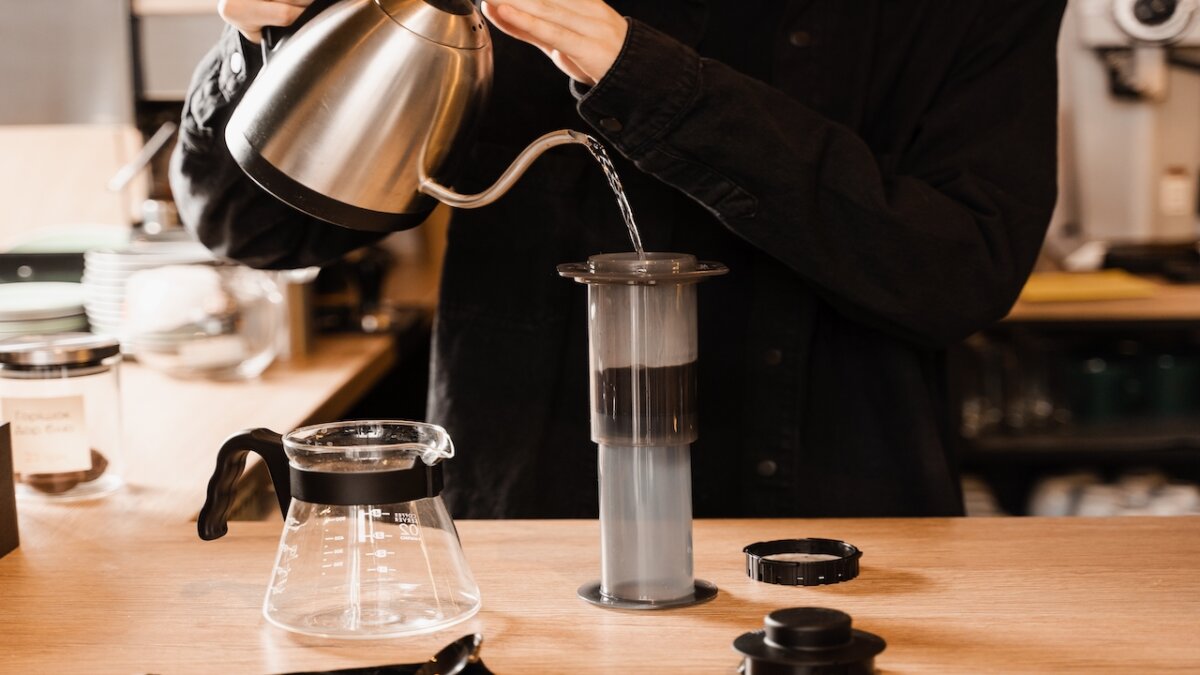
Step 5: Add Water
Add your hot water with the aim to fill your chamber within 10 seconds. Twist the chamber as pour, this will ensure you wet your grounds evenly.
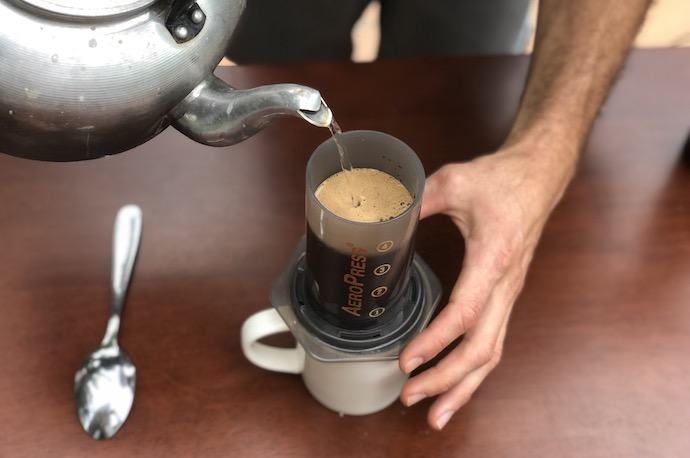
If you’re using a scale: aim for 220 grams of water. If you’re using the cowboy method, add water up to or above the number 4 on the Aeropress chamber.
Step 6: Stir, plug, and wait
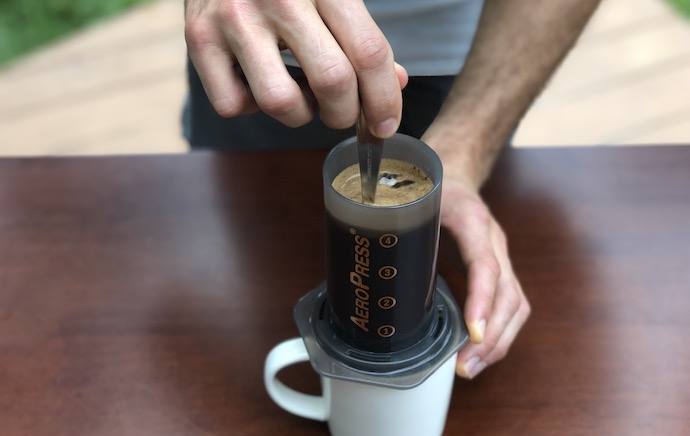
Give the coffee slurry a quick stir.
Use the paddle stirrer (or failing that, a spoon) to stir the slurry. Now grab Aeropress plunger and insert it into the chamber at a slight angle. Straighten it up and pull up a little until it creates a vacuum. This will stop your coffee dripping through the filter.
Insert the Aeropress plunger into the chamber, then straighten it up and pull it out slightly to create a vacuum seal.
Set your timer and wait for 1 minute.
PRO TIP: For best results, stir quickly. From adding water to starting plunging, it shouldn’t take more than ten seconds.
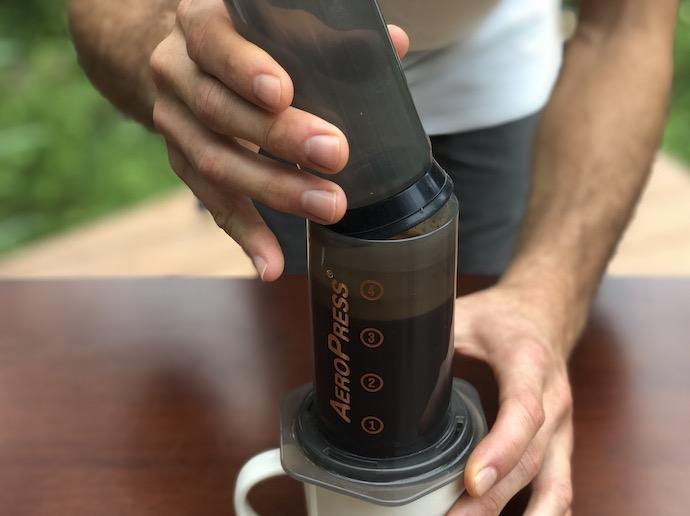
Step 7: Stir, press and time
Remove your pressure seal and give the whole thing another stir. Insert the plunger back into the chamber and slowly begin to press. Aim to push the plunger down fully over the course of 1 minute.
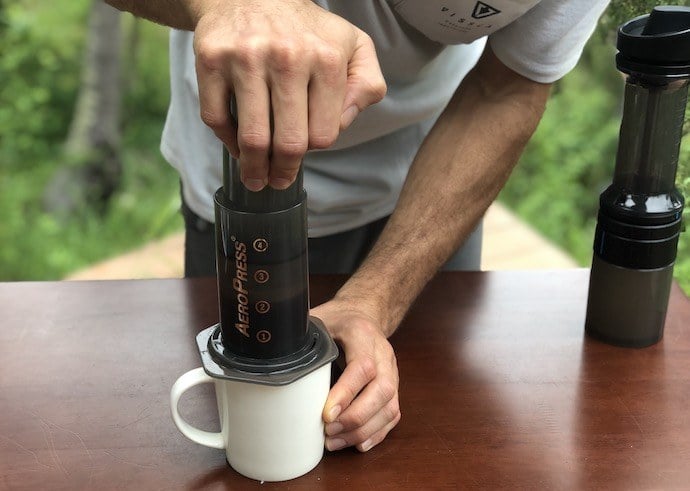
Aim for a 1 minute plunge.
You should feel a good amount of pressure. If you don’t and the plunger goes down too easily, then your coffee grounds are too coarse. However, if it’s really hard to push, then the grinds are too fine. You’ll know when your coffee is brewed when you hear a hissing sound, indicating that there’s no water left in the AeroPress to push through.
Note: Interested in using Aeropress attachments? You can use the Prismo attachment to improve your Aeropress coffee. Learn more about it in our Fellow Prismo review.
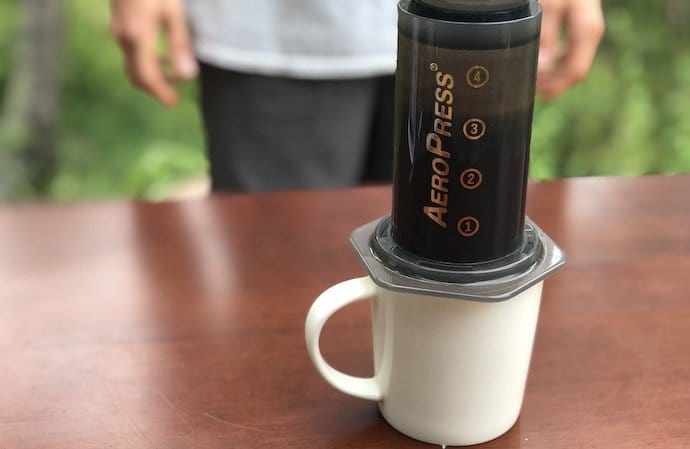
Step 8: Taste and dilute to your liking.
If you feel it needs it, add more water. You should be aware the AeroPress produces a pretty strong tasting cup of Java.
Step 9: Clean up
The best way to clean your AeroPress is to unscrew the cap and push the plunger until both the filter and coffee grounds pop out. The harder you push, the more satisfying it will be. If you’re brewing another cup, your Aeropress is pre heated and ready to go.

Other Aeropress Brew Styles
Explore more Aeropress brew styles. Whether you like espresso or cold brew, here are more ways to make coffee with your Aeropress.
The Verdict
You came here to learn how to use Aeropress, and we’ve shown you the Aeropress standard recipe. But, as we said, there are other ways to brew coffee with this precious little brewer. Check out our site for other Aeropress brewing guides and enjoy the ride down the creativity lane.
FAQs
There are several advantages to using the Aeropress. It is easy to use, clean, and portable, yielding a rich and flavorful cup of coffee. It is also a favorite among coffee enthusiasts and baristas for its ability to brew a consistently excellent cup of coffee.
The Aeropress is different because it combines immersion brewing and pressure extraction into a straightforward contraption. It is also known for its versatility and the ability to use different brewing techniques to achieve different flavors. You can also use it to brew different coffee styles, such as cold brew, espresso-like, or filter coffee.
Yes, the Aeropress is very easy to clean. Unscrew the filter cap, eject the coffee puck and filter into a bin, and rinse the Aeropress with water. It’s that simple! Also, a somewhat more complicated process is cleaning the seal. You do it by occasionally removing the seal from the bottom of the plunger and wash it with warm water and dish soap. This stops coffee oils from accumulating in the seal. You can always use a paper towel to add a bit of abrasion when cleaning.
For the Aeropress, we would recommend a medium-coarse grind size. However, you can experiment with slightly finer or coarser grinds to find your preferred taste. This makes each Aeropress world champion stand out by experimenting with the grinds and ratios they use for the brew. You can check out our grind size chart if you’re unsure.
The numbers on Aeropress represent the measurements that are equal to the number of scoops or cups you can use. These measurements are meant for the original Aeropress recipe. So, they made it easy for you to use intended ingredients when making coffee with the Aeropress. However, you do not have to rely on these measurements, if you want to experiment with your brew. It really is up to you.
References
- Killbride, D. (2018, April 02). 5 AeroPress Lessons I Learned From 4 Champions (& Their Recipes). Retrieved from https://perfectdailygrind.com/2018/03/5-aeropress-lessons-i-learned-from-4-champions-their-recipes/
- Sill, L. (2011, May 19). What is the right grind setting for Aeropress, Chemex (other methods), when using a Hario Mini Mill Slim Grinder? Retrieved from https://www.quora.com/What-is-the-right-grind-setting-for-Aeropress-Chemex-other-methods-when-using-a-Hario-Mini-Mill-Slim-Grinder
- World AeroPress Champion Recipes. (n.d.). Retrieved from https://aeropress.com/pages/wac-recipes
- Sales, A. T. (2019, June 11). How to Brew Coffee With an AeroPress. Retrieved from https://www.aeropress.co.uk/blogs/news/brew-coffee-aeropress
- FAQs for the AeroPress Coffee Maker. (n.d.). Retrieved From https://aeropress.com/pages/faq

It sounds like I should try out the Aeropress – but I would like to reduce the waste from the coffee filters. Can it be used with reusable filters?