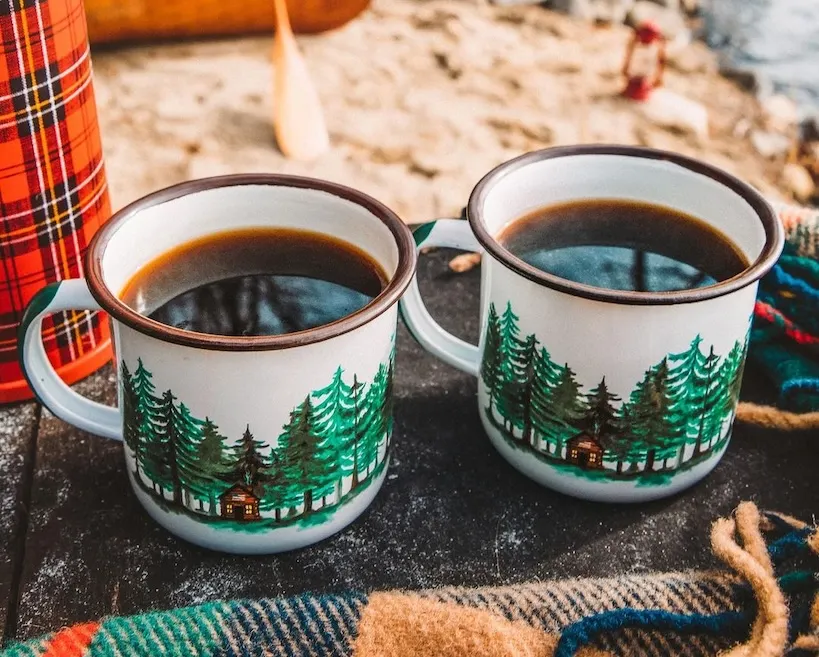
HOW TO MAKE COFFEE WHILE CAMPING: THE TOP GEAR AND TIPS
Camping and coffee might not sound like they go together well, but trust me, they do.
I’m an avid hiker and rock climber, so I’ve spent many nights sleeping in a tent under the stars. While I’m willing to forgo fancy meals or basic hygiene in the pursuit of adventure, one thing I’ll never sacrifice is fresh coffee. After all, caffeine is even more important before embarking on a long day on the trail or cliff face.
In this article, I’ll review the different ways to make coffee while camping and the best gears I tried for the job, whether I’m deep in the backcountry or parked in a campground.
5 Ways to Make A Cup Of Camp Coffee
First, you’ll need to choose a coffee brewing method. Making camping coffee doesn’t involve the same precision and subtleties as brewing at home, but that’s not the point (1).
“Like many other coffee moments, I think it’s all about where you are, how you are feeling at the time, who you are with.”
Here is a quick rundown of the best ways to make coffee while camping and my pick for the best coffee maker for each method.
1. French Press
A French press is an excellent camp coffee maker because it doesn’t require much precision to brew a good cup of coffee. I recommend you use a French press made of metal for camping, as the glass versions are fairly fragile. They can be quite heavy, so I prefer this method for car camping rather than long hikes.
My favorite camping French press is the Stanley Adventure All-In-One. This stainless steel coffee press doubles as a camping pot, so you don’t need to pack a separate way to boil water.
2. Moka Pot
A Moka pot uses steam pressure to make a strong coffee that approaches espresso. I suggest an aluminum model for camping, which is plenty durable while being much lighter than stainless steel.
Moka pots have the advantage of being all-in-one devices that boil and brew, and they are easy to clean. However, they are best for serving just one or two coffee drinkers, as the larger models are quite bulky.
You can buy a specialized camping Moka pot, which might be worthwhile if you’re short on space, but any of the best Moka pots will do the job. When I hit the road, I usually just pack my basic little Primula brewer. It’s cheap, durable, and easy to use.
3. Percolator
A percolator is an old-school brew method that isn’t as popular for home brewing, but it’s still a great option for camp coffee – especially if you need to brew for a crowd. Like the Moka pot, a percolator coffee pot doesn’t require a separate kettle. Just settle it over a flame and let it percolate until the coffee is as strong as you want.
Fans of the best coffee percolators love their very hot, strong brew, while detractors claim it can taste burnt or over-extracted.
I’m partial to the classic Coleman Stainless Steel Percolator, which can make up to 12 cups at a time. Just beware that it is a hefty beast, so it’s best for when you’re parked in a campground with a crew to serve, not trekking to the middle of nowhere.
4. Pour Over
I am very particular when I make pour over coffee at home – scale, gooseneck kettle, timer, specialty coffee beans. But you can forgo all those extras while camping and still enjoy a great cup of coffee. The only downside to drip coffee is that you generally have to pack coffee filters as well.
I usually take my plastic Hario V60 if I want a pour over while camping. I think it’s pretty cool that the same coffee dripper used by professional baristas in coffee shops can just as easily be tossed in my backpack.
But if you’re looking for a dedicated camping brewer, check out the Wacaco Cuppamoka, which includes a built-in travel mug.
5. Aeropress
At last we come to the Aeropress, which is my favorite coffee method for camping. It’s easy to use, super lightweight and durable, and brews a delicious cup of coffee. Importantly, it’s also easy to clean, even when your dishwasher is hours away.
If you’re shopping for a camp-specific brewer, consider the Aeropress Go. It includes a coffee cup that doubles as a carrying case for the whole set-up – perfect for compact and lightweight travel. But in my opinion, if you already own the Original Aeropress, there’s no reason to buy the Go. Just pair it with a nice travel coffee mug and hit the trail!
My Camp Coffee Recipe
I’ve brewed coffee every which way while camping, but if I could only choose one method, it would be the Aeropress. Here’s my recipe:
Ingredients
- 15 grams medium-fine ground coffee
- 12 ounces water
- Aeropress
- Pot or kettle
Directions
- Boil water using whatever method you have available (camping stove, campfire, JetBoil). Use some of the water to preheat your camp mug.
- Place a paper filter in the filter cap of your Aeropress and screw it onto the brew chamber.
- Add coffee grounds to the brewing chamber. 15 grams is about one heaping Aeropress scoop.
- Remove your boiling water from the heat and let it sit for 30 seconds to cool.
- Fill the Aeropress brew chamber to the (3) mark. Attach the plunger and pull it up slightly to prevent leakage. Steep for 1 minute and 30 seconds.
- Press the steeped coffee into your preheated mug. Top it off with more hot water, to taste.
How Do You Make Coffee Without A Coffee Maker For Camping?
What if you want to make camp coffee without burdening yourself with a coffee maker? The answer is cowboy coffee, which you can make in any pot. It’s an immersion method similar to a French press coffee but without a filter.
Cowboy coffee has a reputation for being a bit rough and tumble, but you can actually make great coffee with the right technique. In fact, in its early history, cowboy coffee had a reputation for quality because it was always made with freshly roasted and ground beans (2).
Here’s a quick recipe to brew one cup at a time. It can easily be scaled to make larger amounts of coffee to serve a crowd or to pour into a coffee thermos to enjoy later.
Ingredients
- 2 tablespoons of medium-ground coffee
- 1 cup of water
- Camping pot
Directions
- Boil one cup of water over a campfire or camp stove.
- Remove the water from the heat and cool for 30 seconds to hit the ideal coffee brewing temperature.
- Add the coffee to the water. Stir for 15 seconds.
- Let the coffee sit for 2 minutes. If it’s a cold morning, put the lid on and wrap a piece of spare clothing around the pot to keep your coffee warm.
- Stir for another 15 seconds, then steep for another 2 minutes.
- Pour your coffee into a coffee mug, going slowly to leave the grounds in the pot.
For more information – plus classic variations using eggshells, a coffee bag, or a sock – check out my detailed Cowboy Coffee Recipe.
Freshly Ground Coffee Beans Taste Better
Should you bring a coffee grinder on your camping trip? If you’re on a long backpacking mission where every ounce of weight matters, probably not. Get your coffee ground at home, weigh out your servings, and seal them in Ziploc bags for the journey.
But if you’re driving to a campground or just taking a short hike to your campsite, packing a grinder guarantees a better-tasting morning brew.
Any good-quality manual grinder is practical for brewing camp coffee. Personally, I like the Porlex Mini II grinder because it fits inside the brew chamber of my Aeropress, making a perfect coffee kit. For more rugged travel, the VSSL Java grinder is a super durable (but heavier) option that I’ve used for bike-packing trips.
How Do You Make Espresso While Camping?
Unlike brewing coffee, making espresso requires very high pressure, which is harder to achieve without an electric pump. But that doesn’t mean it’s impossible!
For backcountry espresso, it’s hard to compete with Wacaco. The brand excels at travel espresso makers. They rely on a hand-powered pumping mechanism similar to bicycle pumps to achieve the roughly 9 bars of pressure needed for a proper espresso (3).
The Wacaco Picopresso is the clear winner when it comes to espresso quality, but it’s a bit finicky to use. It needs to be dialed in to achieve perfection, just like a real espresso machine, and it works best with freshly ground beans.
If you just want a quick and easy shot to jumpstart your morning, turn to the Wacaco Nanopresso instead. It’s easier to use, works with pre-ground coffee, and includes a built-in espresso cup.
What About A Camping Latte?
Amazingly, this is also possible with the clever Bellman CX25P Espresso Maker. Think of it like a Moka pot turned up to 11. It achieves the high pressures needed for true espresso extraction and includes a steam wand for all your foamed milk needs. It’s a pretty heavy contraption, however, so I’d save it for drive-in camp spots.
A battery-powered handheld milk frother paired with your espresso maker is a valid lightweight alternative. It won’t yield the same silky microfoam as a real steam wand, but I doubt you’ll be complaining as you sip a morning cappuccino miles from civilization.
There are some fancy frothers on the market, but I prefer the dirt-cheap Zulay frother for camping. At under $10, I’m not overly concerned when the little whisk inevitably gets bent in my pack.
When Is Instant Coffee The Right Choice?
Instant coffee has come a long way from the terribly bitter freeze-dried powders of the past. There are now some delicious specialty instant coffee options.
While I still generally prefer to brew a fresh cup, instant coffee packets make sense for ultra-lightweight backpacking or multi-day rock climbing trips.
They spare you from having to pack any brewing gear, come pre-measured in single servings, and often include creamer, sweetener, or health-boosting additives to make your morning coffee experience extra tasty and energizing.
My personal favorite for adventuring is the Alpine Start Dirty Chai Latte, which was my go-to coffee when I hiked a long segment of the Pacific Crest Trail a few years ago.
Final Thoughts
Clearly, there are many ways to make camp coffee in the morning, each best suited for a particular camping style. Parked in the RV lot with the whole family? Pull out the percolator. Tenting in nature with a special someone? Try a French press or Moka pot. Sleeping on a portaledge in Yosemite Valley? Now is the time for instant coffee.
My all-around favorite method to brew a hot cup of coffee in nature is the Aeropress. It’s lightweight, durable, easy to use, and brews a reliably strong and delicious camp coffee.
How do you like to brew and drink coffee when camping? Let me know in the comments below!
FAQs
The easiest way to brew coffee without heating it is to use instant coffee. This is worthwhile on long backpacking trips where you don’t want to bring extra gear like a pot and stove. Alternatively, you can make overnight cold brew in an Aeropress! Just start it steeping before you go to bed and press in the morning.
The best kind of milk for camp coffee is powdered milk, which is lightweight and never spoils. It’s a nice change from black coffee. And if you’re on a big hiking trip, it’s an easy way to add more calories to your morning.
There are many ways to make coffee without a machine, depending on how you like your coffee. Examples of manual brewers include the press pot, percolator, coffee dripper, Moka pot, and Aeropress. The cowboy coffee method allows you to make coffee without any kind of coffee maker. Turkish coffee is similar but is traditionally made in a specialized pot called an ibrik or cezve.
References
- Brones, A. (2016, July 5). The Lonesome Art of Cowboy Coffee. Retrieved from https://sprudge.com/cowboy-coffee-94275.html
- Lee, F. (2023, January 23). The Untold Truth of Cowboy Coffee. Retrieved from https://www.mashed.com/912562/the-untold-truth-of-cowboy-coffee/
- Lapierre, F. (2022, October 13). Feeling the pressure: Why baristas are ditching the 9-bar standard for espresso. Retrieved from https://newgroundmag.com/2022/10/baristas-ditching-9-bar-standard-espresso/

When I camp and make “camp coffee”, I use the method I learned as a Girl Scout leader: Boil water in a pot, add proper amount of coffee (medium grind). Stir and remove from heat. Let brew 4-5 minutes. Add 1/2 cup cold water and stir once. Let sit for a minute or two and enjoy. The cold water added at the end helps the grinds settle to the bottom. Be careful pouring out that last cup, though. No paper filters to deal and you can use any kind of pot.
Hi Patricia! This is actually a great tip! Thanks for sharing this one with us.