COFFEE CUPPING GUIDE: HOW AND WHY TO CUP COFFEE AT HOME
Learn why coffee professionals use cupping to define a coffee and how you can experience the same process at home!
Have you heard of coffee cupping? If you’re anything like me, you probably assumed it was only for specialty coffee industry insiders. The truth is that while high-end cupping is intensely detailed and highly skilled, any coffee lover can experience the process!
Cupping coffee at home is a fun way to develop your tasting skills and increase your coffee knowledge – not to mention, a great excuse to treat yourself to some fancy coffee beans.
In this guide, I’ll explain the cupping process and why professionals use it. Then I’ll walk you through how to perform your own at home. You don’t need to be nearly as meticulous as the pros, but there are still a few essential rules to follow.
What Does It Mean To Cup Coffee?
Cupping is an essential part of a coffee’s quality control process. Specialists at various stages of the coffee supply chain cup coffee to make sure their product is as good as it should be (1).
At its simplest, cupping is a way to taste, evaluate, and compare the flavor, quality, and potential of a given coffee.
Cupping is a formal way for specialty coffee experts to evaluate the taste and aroma of a coffee. It relies on detailed guidelines from the Specialty Coffee Association (SCA), which establish everything from the grind size to the scoring system (2).
What is the difference between coffee tasting and cupping?
Coffee tasting is a broad term with no associated rules. Anytime you drink coffee is technically a “coffee tasting.” But it often refers to trying several brews to compare different beans, roasts, processing, brewing methods, etc.
Coffee cupping, in contrast, is a detailed process with a specific set of rules. It is almost scientific in nature, performed identically at all levels of the product chain and all around the world. Think of cupping coffee as a specific type of coffee tasting.
What Are The Benefits Of Coffee Cupping?
The main benefit for the home coffee enthusiast is the potential for knowledge. By taking a focused approach to evaluating your coffee, you’ll gain a greater appreciation for the diversity of coffees available and the collection of flavors they embody. Just as importantly, it’s a lot of fun!
What is the purpose of cupping in the coffee industry?
The coffee cupping process was initially used to detect defects, but the growth of specialty coffee has expanded its mandate. Within the coffee industry, cupping is now used as a quantifiable way to evaluate a coffee’s flavor and potential – as well as an educational tool to keep the tasting palate sharp.
The cupping protocol provides a common language for everyone in the coffee supply chain to discuss a coffee.
That includes the farmer, producer, exporter, coffee roaster, barista, and consumer. In this way, it helps guide purchasing decisions and price setting, ensures quality control, and informs roast profiles and brewing methods.
When you read flavor descriptors or suggested brewing recipes on a bag of coffee beans, they’re a result of the roaster’s cupping notes.
How Is Coffee Cupping Scored?
Cupping at home need not require a score sheet. I prefer simply to take notes on my experience, perhaps differentiating between what I liked and didn’t like about a given brew.
Professional coffee cupping is a different story. Each taster numerically scores the coffee in a number of categories (fragrance/aroma, flavor, aftertaste, acidity, body, balance, sweetness, uniformity, cleanliness, overall, and defects).
These scores are tallied to yield a final score between 0 and 100. To give you an idea, anything below 40 is considered Off Grade, 70-74 is Average Quality, 85-89 is Specialty, and 95+ is Super Premium Specialty.
How Do We Cup Coffee?
Coffee cupping to SCA guidelines requires following a detailed set of rules, some of which I’ll lay out in this guide. Though precise, they aren’t challenging to follow, and it’s okay if you miss the mark. The most important thing is that every coffee you taste is prepared and tasted the same way.
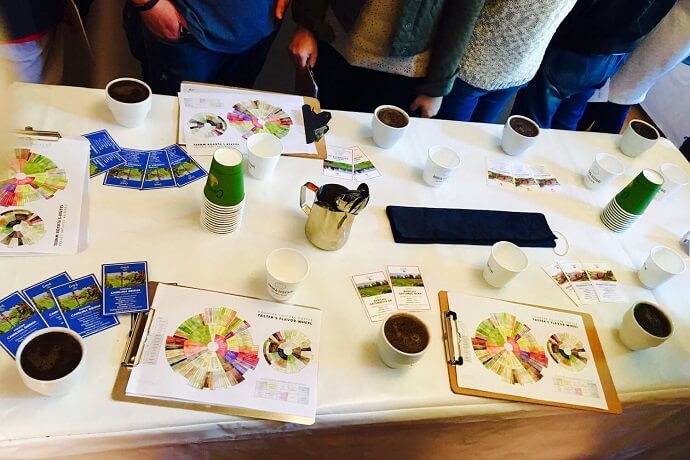
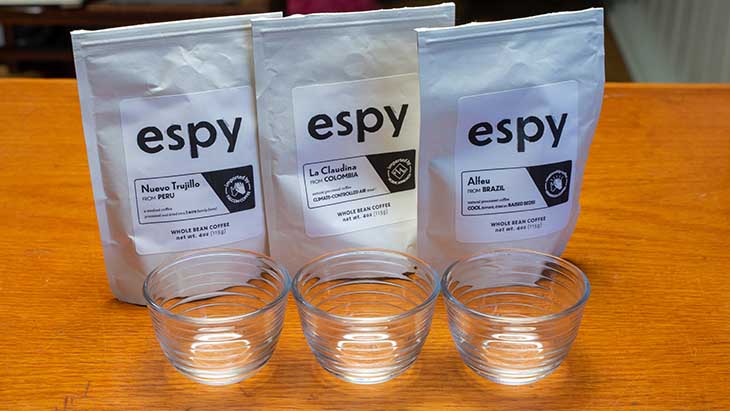
Coffee Cupping Supplies
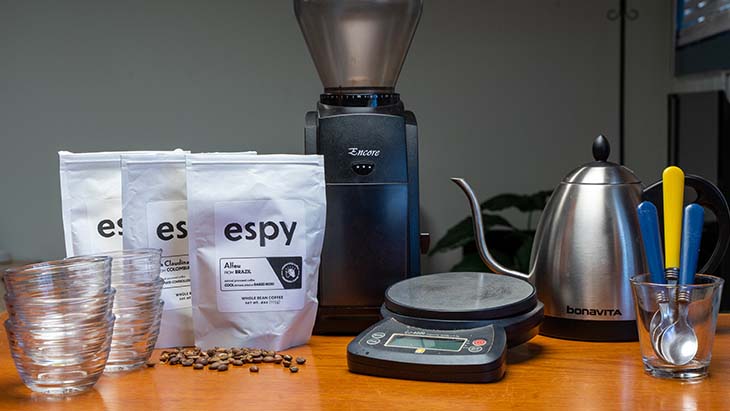
- Two (or more) samples of freshly roasted whole bean coffee
- Two (or more) identical cups or bowls for tasting, ideally measuring 5 to 7 oz
- Burr coffee grinder
- Coffee scale
- Kettle
- Filtered water
- Cupping spoon
- Cupping form or paper to make notes
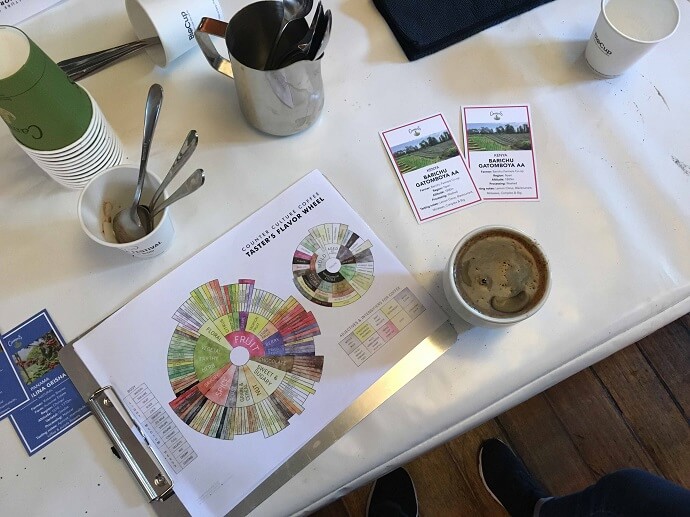
- Coffee flavor wheel (optional but recommended)
Choosing The Coffee
Most professional cupping is done using single-origin coffee beans with a light or light-medium roast. This is undoubtedly the best strategy for exploring how origin and growing conditions influence flavor.
That said, in the non-professional context, I think you can have a fun and educational experience using any good coffee you enjoy. Just ensure that it is whole bean, freshly roasted, and reasonably high quality. Steer clear of the pre-ground can of Folgers.
It’s Important To Purge Your Grinder
Every time you use your burr grinder, residual coffee grounds remain in the chamber. Even this minuscule amount of a foreign flavor can affect your perception when formally tasting coffee, so it’s important to purge the grinder when switching coffees.
All you need to do is first grind a small batch (about 5 grams) of the same beans you’re preparing to cup to line the grinder’s interior.
How To Cup Coffee At Home: A Step-By-Step Beginner’s Guide
Cupping at home should be fun and relaxed, but certain parts of the process must be done in order and in a timely manner to get the most out of the experience. Follow the steps below or check out our video guide:
Step 1: The Set-Up
Believe it or not, the SCA has specific guidelines around the environment in which you perform your cupping. They recommend a quiet, well-lit area with a comfortable temperature, no competing aromas, and minimal distractions. So set aside the smartphone and turn off that podcast.
Set all the required cupping glasses on the table. For each person, accompany the glasses with a coffee flavor wheel, paper and pen, and a cupping spoon.
Step 2: Weigh And Grind The Coffee
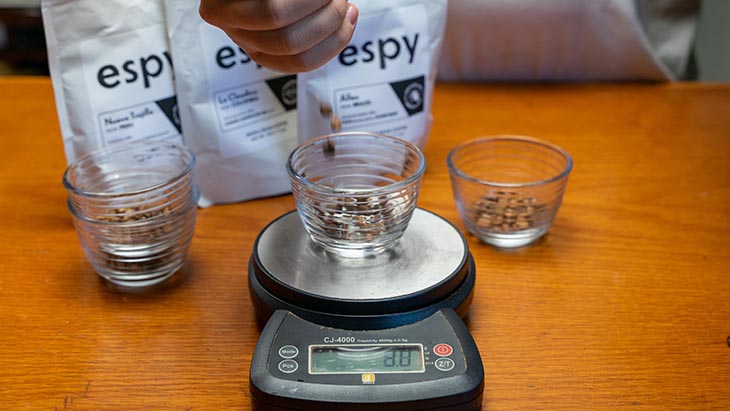
Weigh 8.25 grams of whole beans for each coffee you plan to cup. If your scale isn’t that precise, 8.2 or 8.3 grams is just fine. Remember to set aside a few extra beans to purge the grinder.
After purging the grinder, grind each sample directly into the cupping glass. Aim for a medium-coarse grind size, similar to that used for a Chemex pour-over.
Pro tip: Minimize waste by saving the ground coffee you used to purge the grinder for brewing later.
Step 3: Smell The Grounds
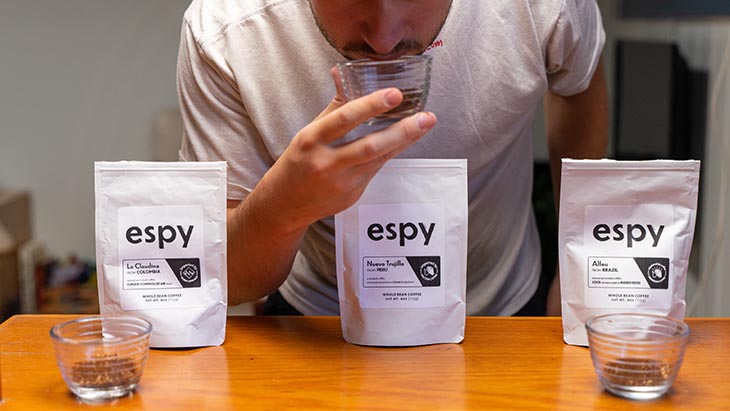
Evaluating the fragrance of the dry coffee is the first stage of the cupping process. It must be done with freshly ground coffee, so perform this step within 15 minutes of the last.
Open your mouth and take a sniff of each coffee sample, breathing through your mouth and nose. Get nice and close to immerse yourself in the smell completely. Try closing your eyes to help focus on your olfactory senses.
Take notes on everything you notice, and feel free to use unconventional words to get the description you need. There is no wrong answer.
Step 4: Brew Coffee
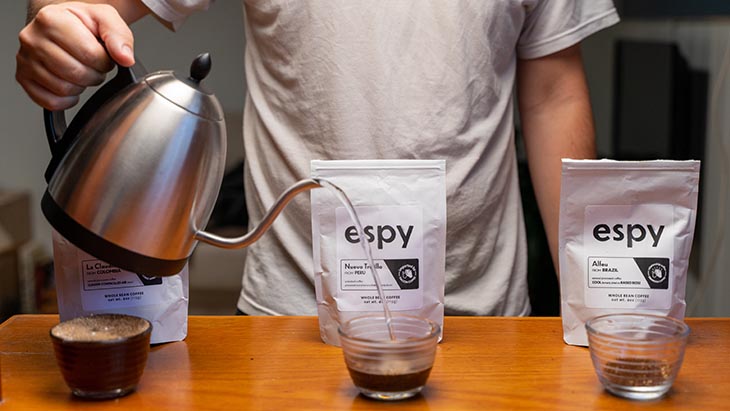
Heat freshly drawn water in a kettle to 200 F.
Pour 150 g (150 mL) of the hot water over the grounds in each cupping cup, ensuring all the grounds are wet.
Set a timer, and let the coffee steep for 4 minutes.
Pro tip: The SCA recommends water with total dissolved solids between 125 and 175 ppm, but you don’t need to get bogged down in those details. Just use good-quality filtered water, and avoid softened or distilled water.
Step 5: Break The Crust And Smell Again
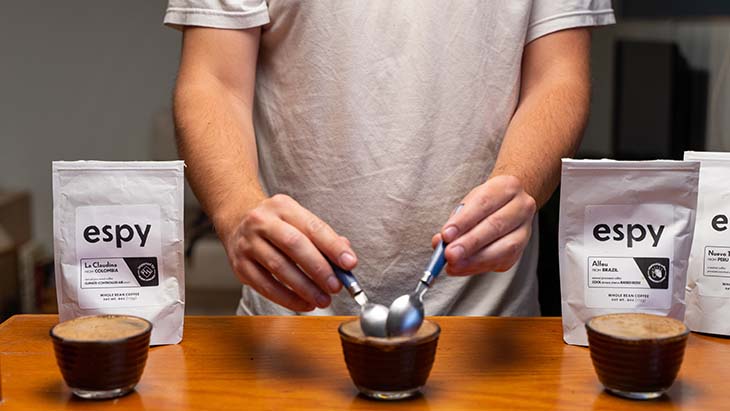
By the end of the steeping time, the top of the bowl will have developed a thick layer of floating coffee grounds and bubbles called “the crust.” Using two spoons, break the crust by pushing the floating grounds out of the middle of the bowl and to the sides.
Open your mouth and take a deep breath. The smell after breaking the crust is the closest introduction to the actual taste of the coffee.
Continue to do this with all of the samples, and don’t forget to take notes!
Pro tip: Make sure to rinse the spoons between each sample to avoid cross-contamination.
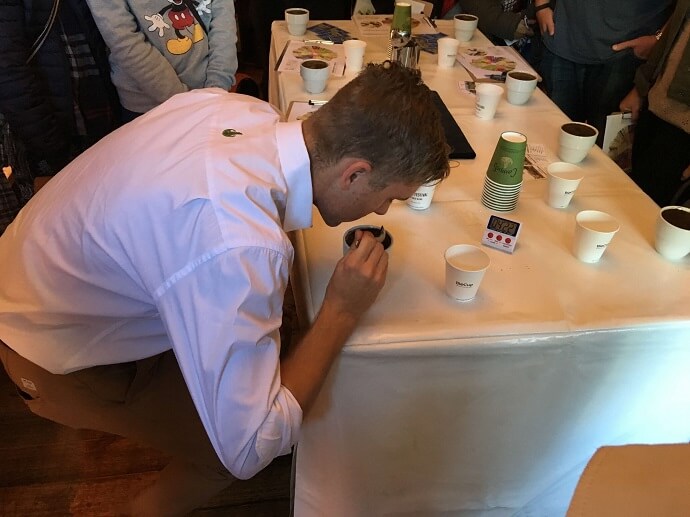
Step 6: Taste The Coffee
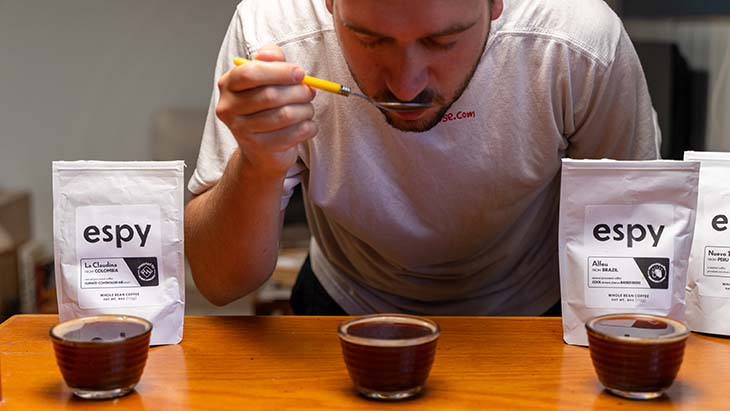
Finally, you get to drink! Begin tasting each cup of coffee when it has cooled to roughly 160 F. If you don’t have a thermometer, this is approximately 5 minutes after you break the crust.
Take a clean cupping spoon and skim a spoonful of coffee out of the center of the bowl, doing your best to avoid any coffee grounds. Slurp the coffee so it hits the roof of your mouth and your tongue on the way to the back of your mouth. Keep it in your mouth for a moment, moving it around, and then swallow or spit it out.
Pay attention to the flavors, acidity, balance, body, mouthfeel, and aftertaste. Take detailed tasting notes.
Pro tip: Coffee cupping with friends elevates the whole experience. The final step is to compare notes, enjoy a lively discussion, and see how your opinions stack up against the “official” flavors labeled on the coffee bag.
The Verdict
Congratulations! You’ve done your first coffee cupping. Remember, cupping at home doesn’t need to be a rigorous or intimidating process. The goal is to learn about the aroma and taste of different coffees, to expand your coffee knowledge, and to have fun and socialize in the process.
Now it’s time to move on to that coffee roasting course you’ve been wanting to take…
FAQs
A salami shot is another type of tasting protocol, in this case used to evaluate espresso. It involves cutting an espresso shot into several cups during the extraction in order to taste its evolution as it develops (3).
The official coffee-to-water ratio for cupping coffee, as defined by the Specialty Coffee Association, is 1.63 grams of coffee per 1 ounce of water. This corresponds to their suggested golden brewing ratio of 1:18.
The official steeping time for coffee cupping is between 3 and 5 minutes, at which point the crust is broken and the wet aroma is evaluated. However, the coffee sits and cools for roughly another 5 minutes before the actual tasting begins.
References
- Maddock, N. (2019, July 2). Cupping Coffee – Learn to Cup Like Pro. Retrieved from https://patriotcraftcoffee.com/cupping-coffee-like-a-pro/
- Specialty Coffee Association of America Cupping Protocols. (2005). Retrieved from https://atlanticspecialtycoffee.com/wp-content/uploads/SCAA-Cupping-Protocols-2005.pdf
- Aloe, RM. (2022, March 29). Salami Espresso Shots. Retrieved from https://towardsdatascience.com/salami-espresso-shots-d94abad77805
